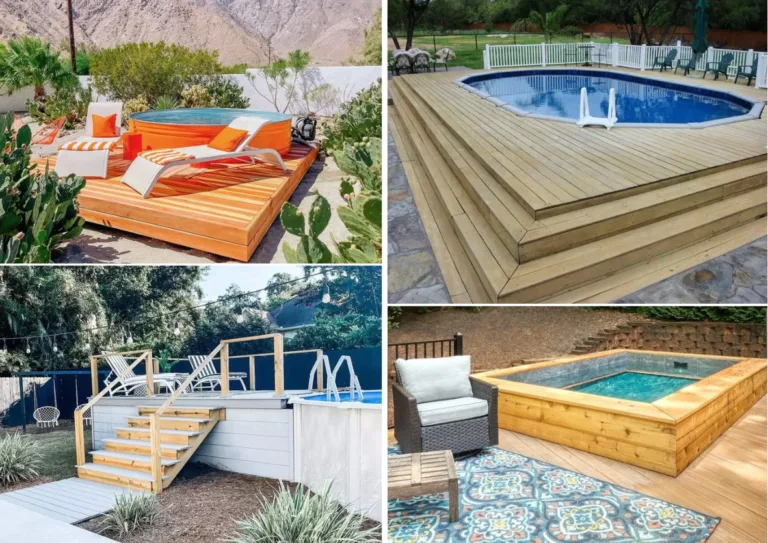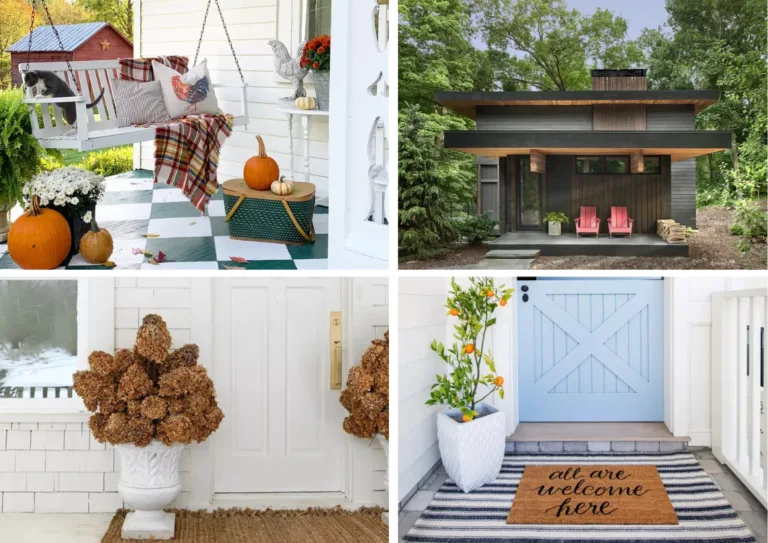
15 Jaw-Dropping Front Step Ideas to Transform Your Entrance
Your front steps make a big first impression. For me, they’re like a sneak peek into a home’s personality.
Whether you want modern sleekness or cozy charm, you’re in the right place. I’ve seen how small touches—a pop of color, natural wood, or even planters—can completely transform a porch.
Let’s dive into these practical and creative front step ideas to inspire your next upgrade.
Why Are Front Steps Such a Big Deal?
Let me hit you with this: the front step isn’t just a functional space—it’s the first impression.
Think about it. Before guests even knock, they’ve already formed an opinion of your home based on what greets them. Does it feel warm and inviting? Stark and minimalist? Or (ouch!) completely forgotten?
Here’s the fun part: upgrading your front step doesn’t have to cost a fortune. A few small tweaks can create a huge impact.
Need examples? Keep scrolling; I have plenty of ideas for every budget.

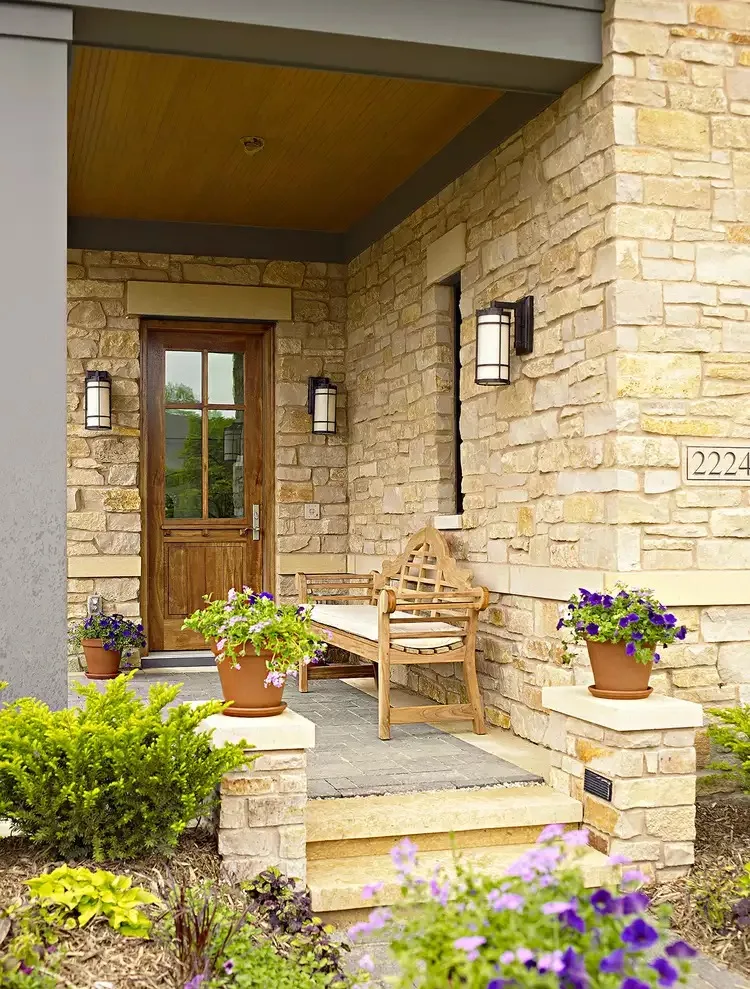
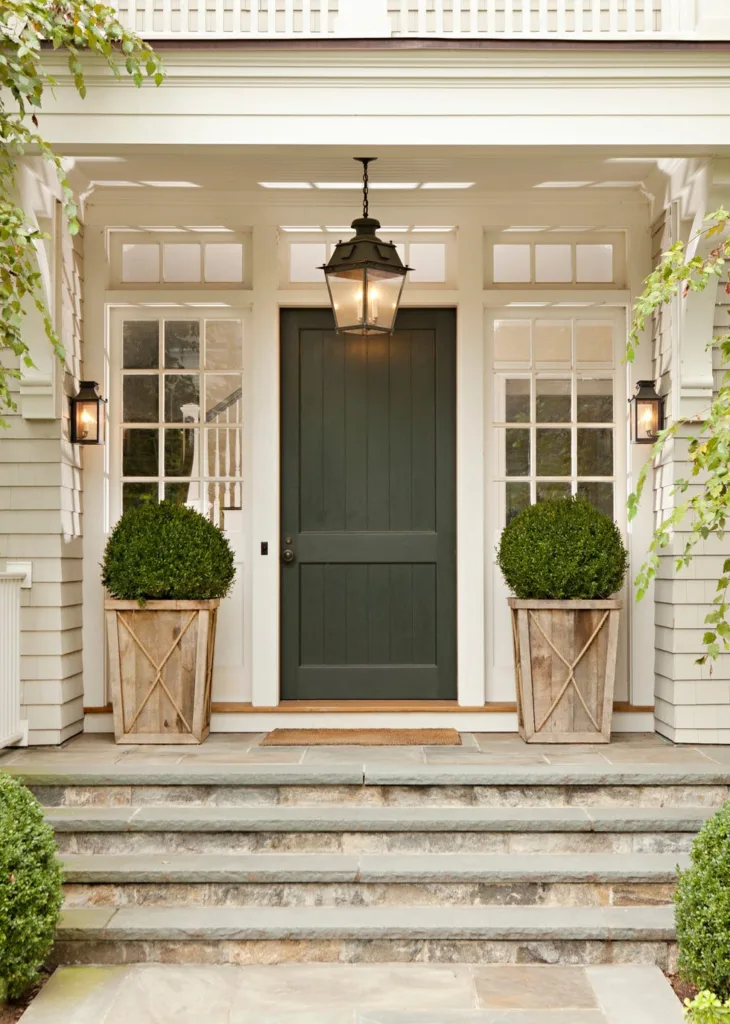
1. Use Stone for a Timeless Look
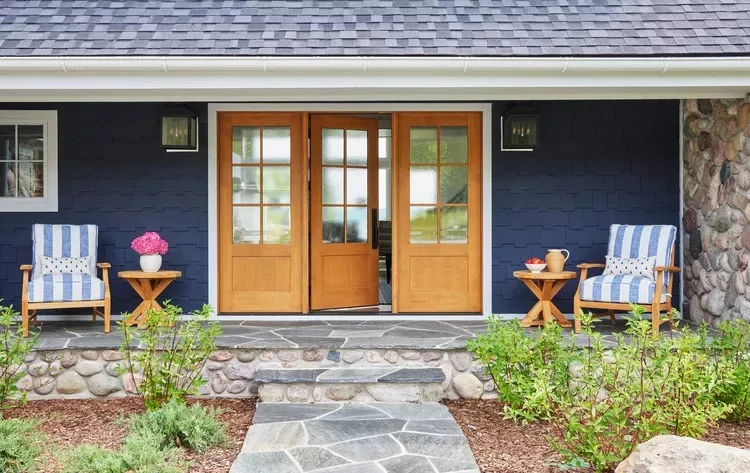 Source: Werner Straube
Stone steps look timeless and nature-inspired, don’t they? The image shows how their rugged texture adds elegance to the porch.
Pair them with neutral tones and wooden doors for a welcoming vibe. Stone materials such as slate or flagstone are great for durability and charm.
To maintain their rich look, be sure to pressure wash occasionally. It’s a small effort for steps that will last a lifetime!
2. Keep it Streamlined with Concrete Pavers
 Source: Nathan Schroder
There’s something effortlessly chic about these concrete pavers! Their clean lines give the porch a contemporary edge.
Light-colored pavers paired with dark gravel create a subtle contrast that works well for modern homes. Plus, they’re low-maintenance!
If this is your style, use drought-friendly plants as accents. It keeps the space fresh without detracting from the minimalist design.
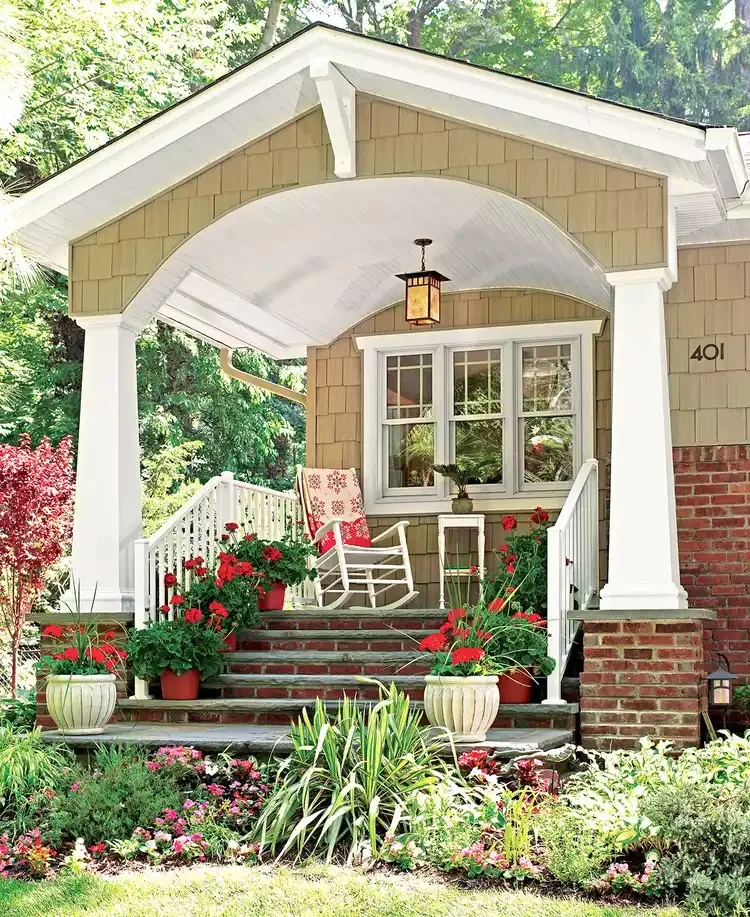
3. Choose Wide Steps for a Spacious Feel
 Source: Roger Davies
Wide steps exude both elegance and function. They provide plenty of room for décor and make the entrance feel more spacious.
The image shows how neat shrubbery framing the steps adds balance. It’s a beautiful, seamless look!
For a similar effect, go for clean, even proportions. Add potted plants or lanterns along the edges to create a cozy, welcoming vibe.
4. Make a Statement with Contrasting Colors
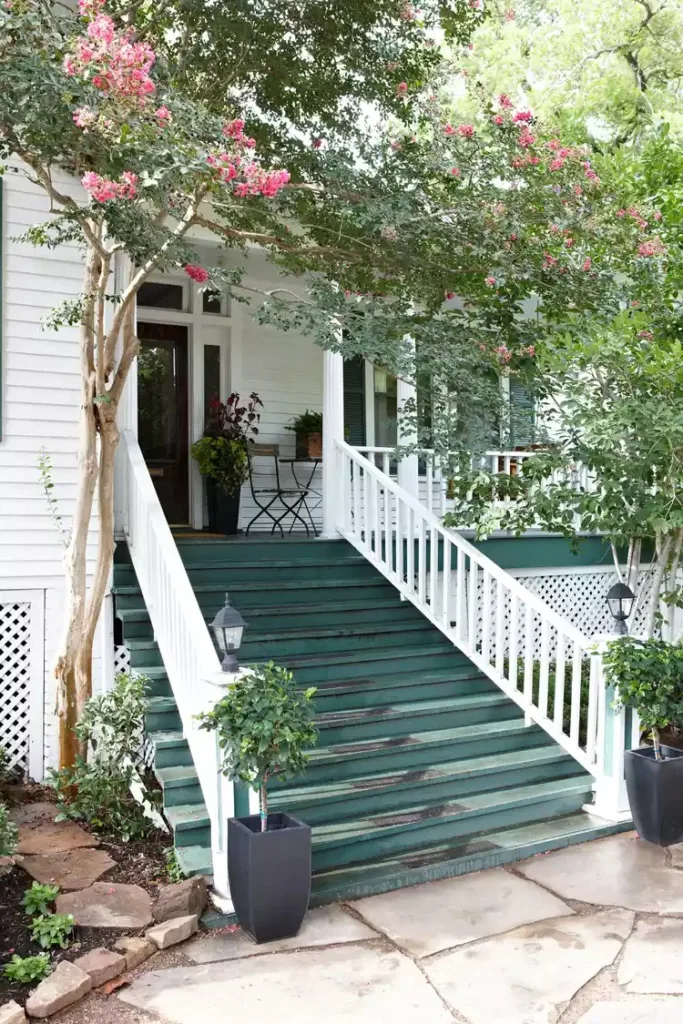 Source: Kim Cornelison
Contrasts work magic, don’t they? These green steps with crisp white railings practically glow against this home’s neutral exterior.
I’ve done something similar by painting porch stairs in bold tones—it adds so much personality! Pair strong colors with soft neutrals for balance.
Not ready for bold paint? Start with colorful planters instead. It’s easy to swap them out for the season or your changing mood!
5. Add a Rustic Touch with Natural Materials
 Source: Greg Scheidemann
Rustic steps like these never go out of style. The textured stone paired with natural wood feels homey and full of character.
When I worked on a similar project, adding vintage lanterns and plants enhanced the rustic charm perfectly. Simple touches create warmth!
If you go rustic, remember this: embrace weathering. A little wear and tear only adds to the charm of stone or wood steps.
6. Stain Your Steps for a Polished Finish
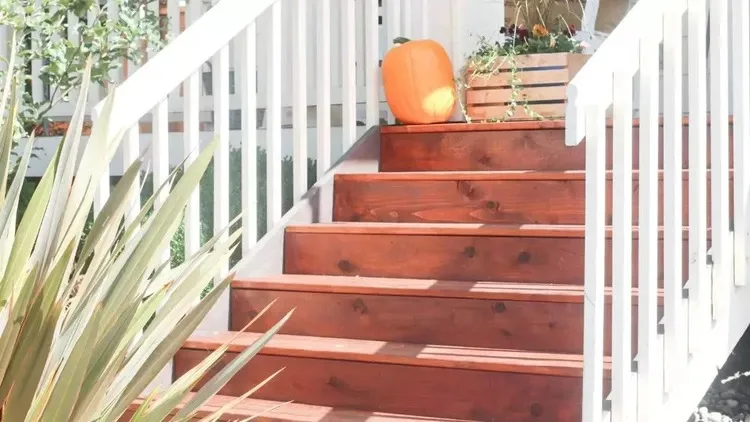 Source: The Duvall Homestead
Freshly stained wood has such a rich, warm vibe! These steps look polished yet approachable, making them a great choice.
I once used a similar deep stain on my own porch, and it instantly felt more inviting. White railings add just the right contrast.
Don’t forget to seal the wood. It keeps the color vibrant and protects against rain or sun damage. A quick recoat every few years works wonders!
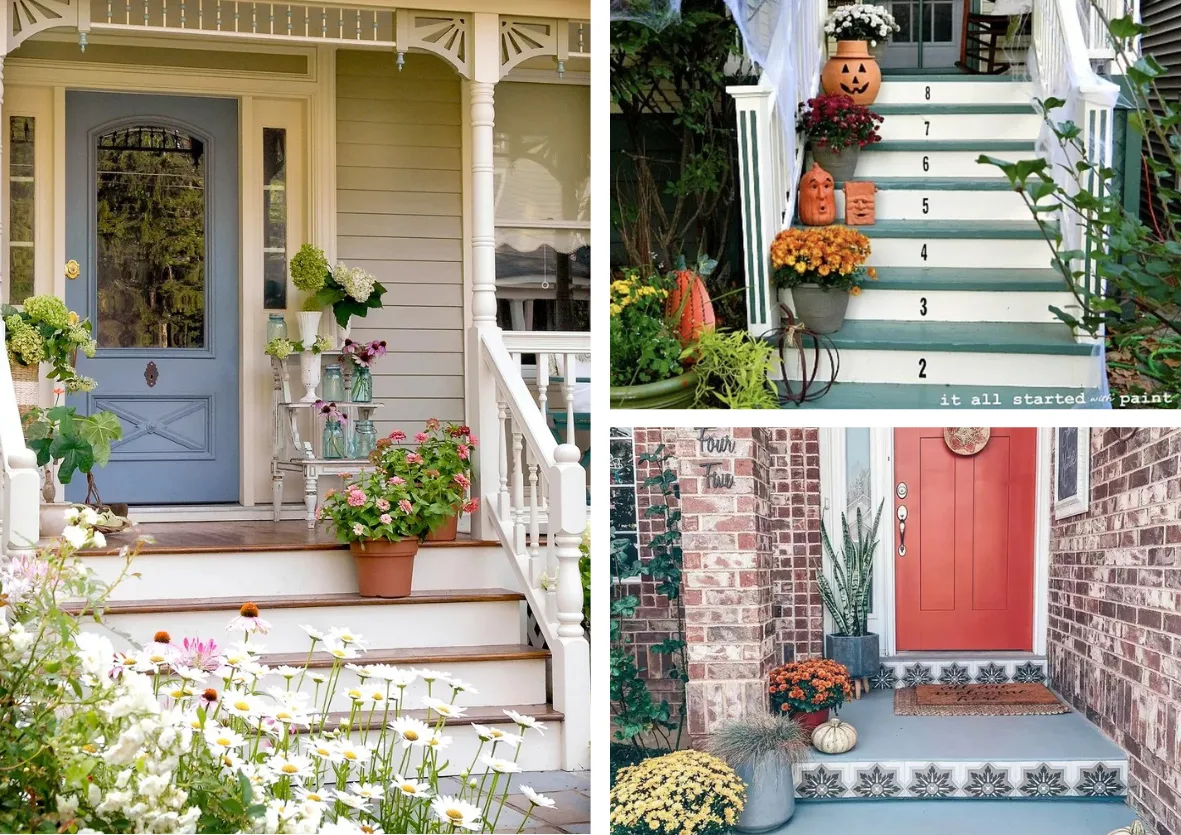
7. Go for a Victorian-Inspired Design
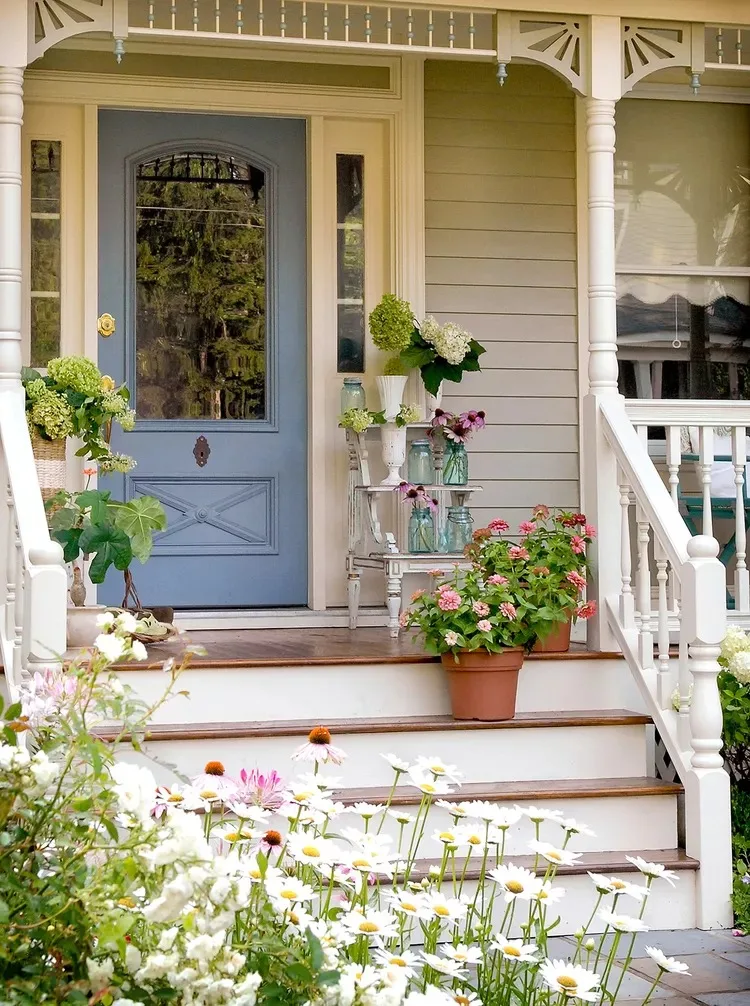 Source: Matthew Benson
There’s something sweetly nostalgic about these Victorian-inspired steps. Their ornate railings and pastel finish scream charm!
I helped a friend upgrade her porch like this by adding soft floral accents and keeping the paint light and airy. It was a hit.
If you adore Victorian style, focus on detail: intricate spindles, delicate lighting, and subtle colors are key to getting the look spot on.
8. Choose Reclaimed Wood for Character
 Source: The Merrythought
Reclaimed wood steps are eco-friendly and full of character. Their weathered tones add a handmade touch that’s impossible to fake.
I suggested reclaimed lumber to a neighbor for their steps, and they loved the natural, rustic feel it brought to their home.
Seal the wood for durability and bring in greenery or farmhouse-style décor for a warm, welcoming entrance with charm to spare.
Learn More About Reclaimed Lumber
Why Reclaimed Lumber for Front Steps?
First off, let’s answer the big question: Why reclaimed lumber? Can’t I just swing by the hardware store and grab some boring new wood? Sure, but where’s the fun in that?
1. Sustainability Is Sexy
Using reclaimed lumber isn’t just about the aesthetic—though it definitely screams “Pinterest-worthy.” It’s also one of the most sustainable choices you can make. You’re literally saving wood that might otherwise end up in a landfill.
Reclaimed wood provides:
- A reduced carbon footprint (cue smug grin).
- A second life for old materials.
- A chance to be part of the “no-waste” movement without having to sew your own clothes.
Seriously, it’s a win for the planet, and it makes you look like a thoughtful homeowner.
2. Character for Days
Ever noticed how new wood looks, well, fake? Like it’s fresh out of a factory and completely lacking in personality? Reclaimed lumber is the opposite of that. Each piece has its own story—saw marks, nail holes, weathering—and those imperfections? Chef’s kiss.
When you use old wood for front steps, you’re adding:
- Charm: No two planks are the same.
- Texture: Think distressed edges and natural grains.
- Unpredictability: In a good way! That slightly uneven color? That’s your new BFF for creating visual interest.
3. Durability That Won’t Quit
This stuff has survived decades (sometimes centuries) of use. It’s like the cockroach of materials—except way prettier. Reclaimed wood has already been through all the shrinking, swelling, and warping that new wood still has to face, so it’s basically battle-tested for durability.
Tips for Working With Reclaimed Lumber
Now that we’ve talked designs, let’s get real. Working with reclaimed wood isn’t quite the same as fresh lumber. It’s more like reverse engineering history. But don’t worry—I’ve got you covered with some pro tips:
- Inspect First: Always check for signs of rot or termite damage. Ain’t nobody got time for crumbling steps.
- Clean Thoroughly: Sand the wood to remove splinters and clean it to get rid of dirt, old paint, or chemicals.
- Seal it Up: This one’s a must. Applying a sealant protects against moisture, mold, and any other outdoor hazards.
- Pre-drill Holes: Reclaimed lumber can crack if you’re not careful. Pre-drill any holes before hammering in nails or screws.
- Embrace Patina, but Stay Practical: Sometimes, you need to sand down rougher edges for safety, even if it makes you cry a little on the inside.
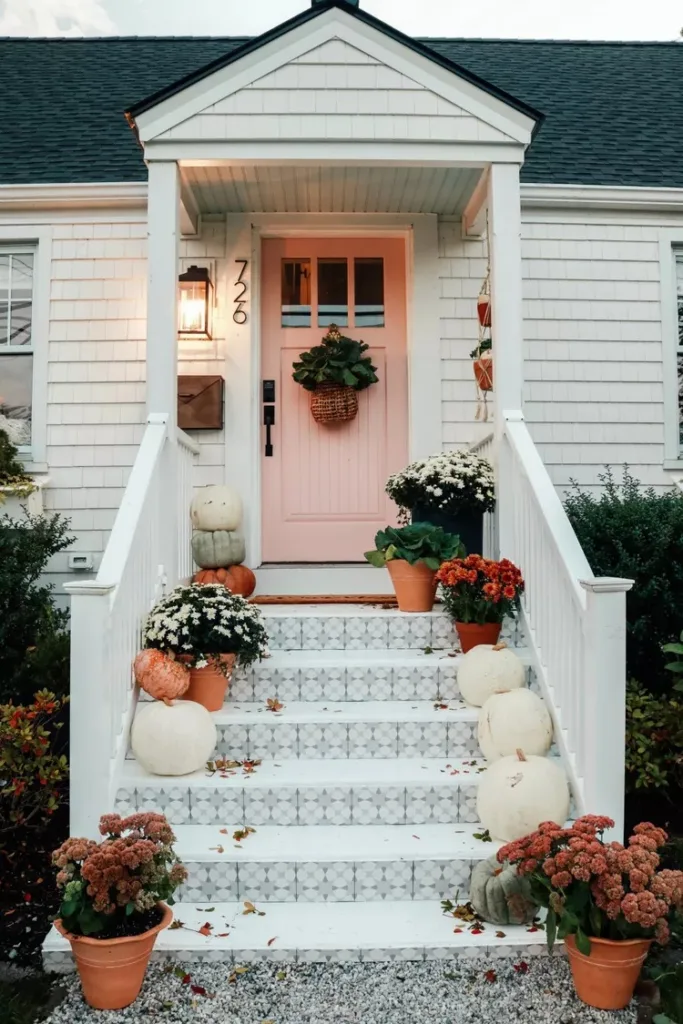
9. Personalize with Numbers
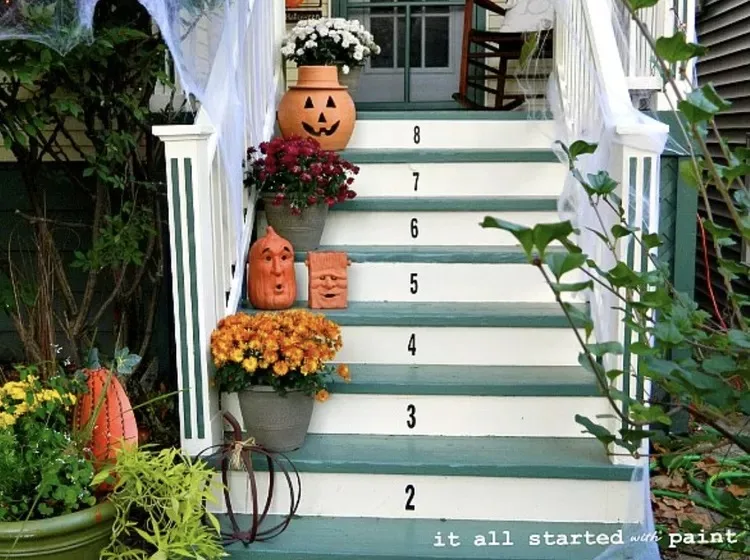 Source: Linda Braden
How fun are these numbered steps? It’s such a playful way to add personality to your entry! Families and guests love the charm.
I helped decorate similar steps for Halloween once, topping them with pumpkins and flowers—it was a conversation starter for sure.
Use outdoor paint for durability, and experiment with bright or contrasting colors to make these numbers truly stand out.
10. Add Warmth with Terra-Cotta Steps
 Source: William Geddes
Terra-cotta steps bring a warm, earthy vibe to any entrance. Their reddish tones look gorgeous when combined with greenery.
I once used terra-cotta tiles in a small Mediterranean-themed garden, and they held up amazingly well. They’re durable and stylish.
To prevent fading, seal them against weather. Enhance the warm aesthetic with potted plants in contrasting colors like yellows or greens.
Learn More About Terra-Cotta Steps
Key Reasons You’ll Love Terra-Cotta Steps:
Timeless Style: Trends come and go, but terra-cotta is foreve
Natural Warmth: Terra-cotta’s reddish-orange tones instantly make your space feel warm, inviting, and homey.
Low Maintenance: It holds up against dirt and wear and tear like a champ. Plus, a quick sweep or rinse is usually more than enough to keep it looking fab.
Weather Resistance: Here’s the thing—terra-cotta thrives in warmer climates but can handle pretty cold ones too (although you’ll need proper sealing).
First off, let’s answer the big question: Why reclaimed lumber? Can’t I just swing by the hardware store and grab some boring new wood? Sure, but where’s the fun in that?
The Technical Side: What You NEED to Know
Okay, let’s pause the design hype for a sec. While terra-cotta steps are undeniably gorgeous, you’ve gotta keep a few practical things in mind. Not to sound like your responsible friend, but it’s better to handle this stuff upfront instead of crying over cracked tiles later (you’re welcome).
1. Proper Installation Is Key
Let’s be real—you don’t just slap some tiles down and call it a day. Terra-cotta requires a solid foundation (literally). Use a concrete base, and ensure each tile is set with a high-quality adhesive.
- Pro tip: Always bring a professional into the mix unless you’re an experienced DIYer. Installing steps isn’t the time to “wing it.”
2. Sealing Matters. A Lot.
Here’s the thing about terra-cotta: It’s porous. Like, soak-up-water-like-a-sponge porous. Without a proper sealant, it can stain or crack, especially in wetter climates. That said, sealing isn’t rocket science—just get a good sealant and reapply every couple of years.
- Hot Tip: Opt for a matte sealer if you want to keep the natural earthy look, and avoid glossy sealers unless you’re aiming for a more polished aesthetic.
3. Don’t Forget the Grip
Slipping on your brand-new terra-cotta steps? Yeah, not cute. Since smooth tiles can get slick when wet, choose textured ones or add an anti-slip coating for safety.
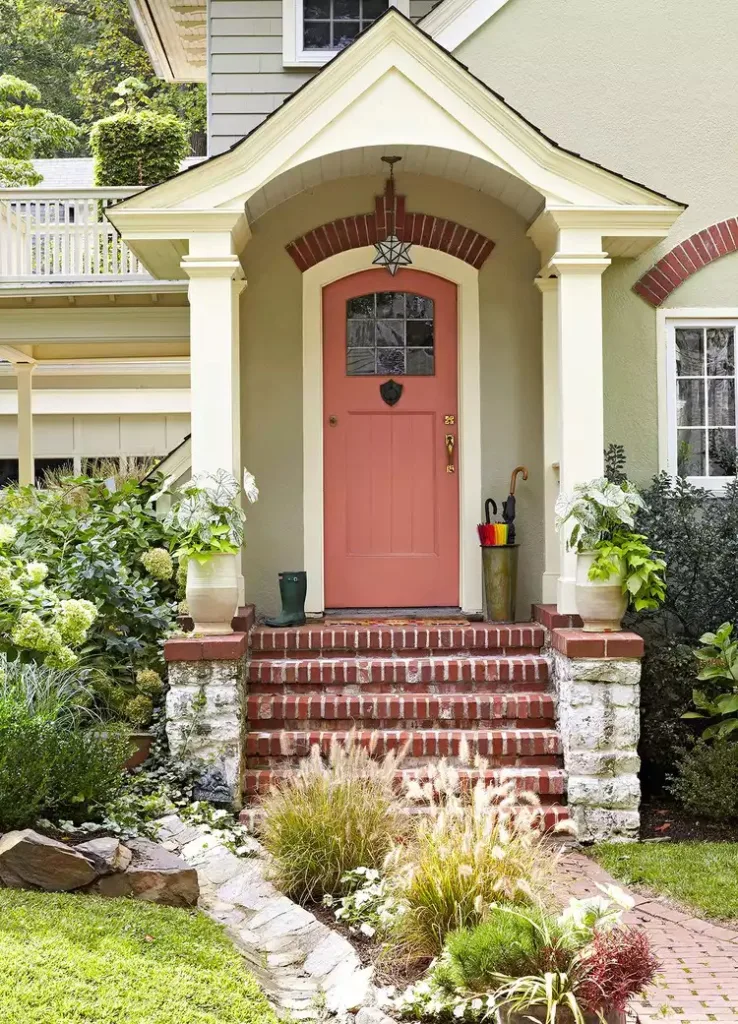
11. Keep It Classic with Brick Steps
 Source: Laura Moss
Brick steps are timeless for a reason. They add texture and charm while blending beautifully with traditional or modern homes.
I love how these look paired with white railings and lush plants—it’s a classic, inviting combination.
If you’d like to try brick, consider integrating patterns like herringbone. They’re subtle enough to keep it timeless but interesting enough to get noticed.
12. Bring Life to Your Steps with Planters
 Source: Karyn Millet
Planters can completely change how your porch feels. This image shows how grouping flowers and greenery around steps adds life and vibrancy.
I like to mix heights when I use planters—taller pots framing the bottom steps and smaller ones closer to the door. It creates a polished look.
For a seasonal twist, swap plants out with the weather. Think bright flowers in summer, and colorful mums or evergreens in fall and winter.
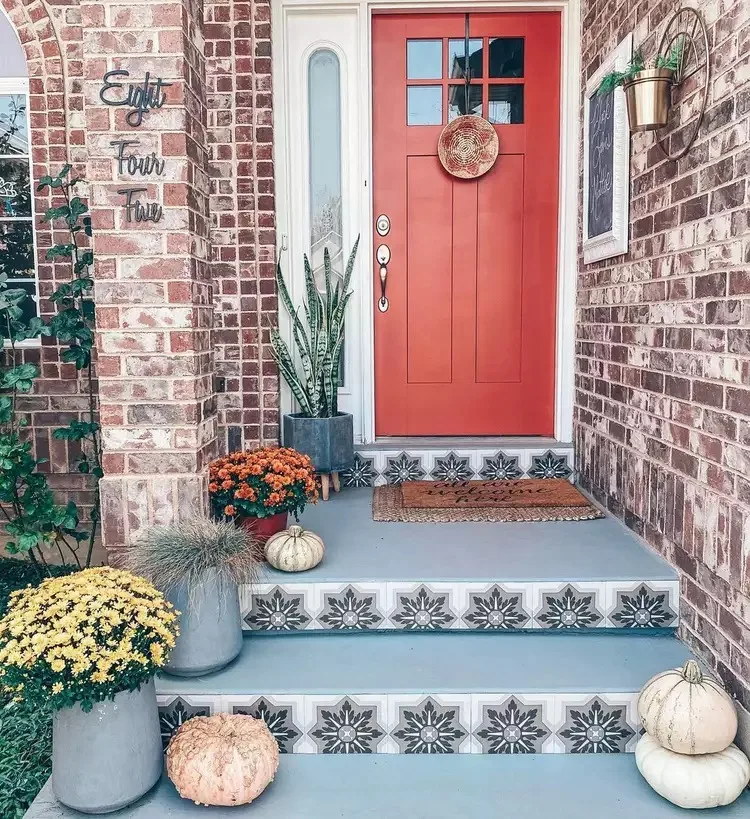
13. Add a Personal Touch with Tiled Steps
 Source: Brooke Christen
Decorative tiles like these are a statement I’ll always love! Their patterns make an ordinary entryway feel unique and creative.
A friend of mine chose something similar for her steps, and it instantly gave her home a more personal touch.
If you’re considering this idea, choose tiles that are slip-resistant and in colors that match your home. A simple design trick makes all the difference!
14. Go Simple with Natural Wood Steps
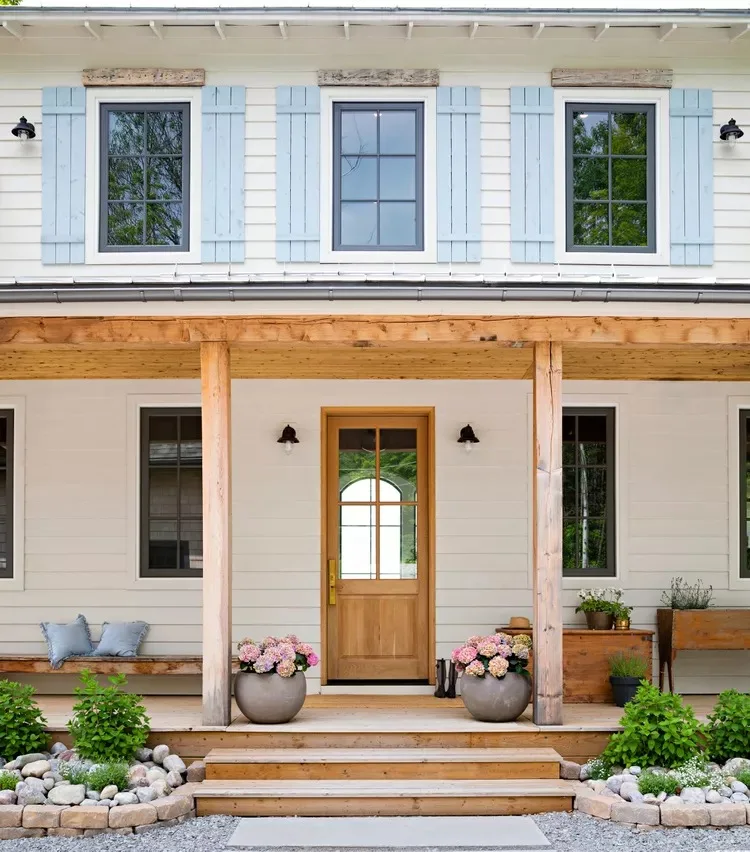 Source: Robin Stubbert
Natural wood steps strike such a beautiful balance between simplicity and style. This image reminds me of how much I love this timeless choice.
If you’re going for this look, sand and stain the wood lightly for a finish that’s soft but polished. It instantly feels fresh!
Pair natural tones with white siding and a bright door for contrast. It’s the kind of clean design that never feels overdone.
Learn More About Natural Wood Steps
Why Choose Natural Wood for Front Steps?
Ever walked up to a house with wood steps and thought, “Wow, this feels homey”? Yeah, me too. Natural wood combines practicality, beauty, and versatility in a way that few other materials can. Here’s why it’s worth considering:
1. Warm and Inviting Aesthetic
Wood has this magical way of being both rustic and modern (how does it do that?!). Whether you lean toward farmhouse vibes or minimalist Scandinavian design, wood steps can easily fit in.
- Rustic charm: Want your house to look like it belongs in the mountains? Choose untreated or lightly stained wood.
- Modern vibes: Use sleek, polished wood like cedar or redwood with a darker stain.
2. Customizable
One of the best things about wood? You can stain, paint, or seal it in pretty much any way you’d like. Want a pop of color? Go bold with deep blues or greens. Prefer classic elegance? Try a natural oak stain for that rich, sophisticated glow.
3. Eco-Friendliness
If you’re into sustainable living (and who isn’t these days?), natural wood is a strong contender. Just make sure to source your wood from responsibly managed forests (FYI, the Forest Stewardship Council stamp is what you’re looking for).
Types of Wood to Use for Front Steps
Not all wood is created equal, my friend. Some are tough and weather-resistant, while others… not so much. Here are the top contenders:
Cypress
Cypress is durable and resistant to rot (because no one wants moldy steps). Plus, it has a natural, light golden hue that looks stunning with clear sealant.
Cedar
Cedar smells amazing (random perk, right?), resists insects, and doesn’t warp easily. It’s also the choice if you like reddish tones.
Redwood
While it’s a little pricier, redwood screams sophistication. Its deep red hue is gorgeous, and its natural oils repel moisture perfectly. Ideal if you live in a rainy area (hello, Seattle friends).
Pressure-Treated Pine
This is your budget-friendly MVP. It holds up well against moisture and pests, and you can stain it to mimic more expensive woods. Just know it requires more maintenance to keep looking sharp.
How to Protect and Maintain Wood Steps
Look, there’s no sugarcoating this: natural wood steps require maintenance. But, with a little TLC, they’ll last for decades and look fabulous the whole time.
Routine Cleaning
- Sweep regularly to avoid dirt buildup (because dirt + moisture = headaches).
- Wash them down every couple of months with mild soapy water.
Sealing and Staining
- Seal your wood: Always use a water-resistant sealer to protect against rain, snow, and UV damage.
- Stain it regularly: Re-stain every 2–3 years, depending on your climate. Pro tip: darker stains tend to last longer.
Handle Repairs Quickly
- Replace damaged boards ASAP. (Leaving them? Big mistake. Huge.)
- Sand and refinish areas prone to splinters.
15. Play with Geometric Patterns
 Source: @thehousethatdiybuilt / Instagram
Geometric designs on steps are bold but don’t overwhelm when done well. These patterned tiles are the perfect attention grabber.
A client once tried a similar look on her front porch, keeping the rest of the space neutral to let the stairs shine. It worked beautifully!
To give this style a shot, keep accessories minimal. A few sleek planters or a simple hanging pot won’t detract from the striking design.
Common Front Step Mistakes to Avoid
Now that we’ve covered the dos, let’s chat about the don’ts. I’ve learned the hard way, so save yourself the trouble. 🙂
1. No Clutter
Don’t crowd your front step with too much stuff. Nobody wants to play “dodge the flowerpot” while walking up to your door.
2. Poor Maintenance
Chipping paint, rusty railings, or dead plants can ruin an otherwise beautiful setup. Keep it fresh by doing small maintenance checks every season.
3. Ignoring Functionality
Sure, your step might look pretty, but can people actually use it? Make sure your space works by leaving enough room for visitors to navigate comfortably.
Conclusion
Your front steps don’t have to be ordinary—there are countless ideas to make them stylish and functional.
Whether you’re in love with bold tiles, classic brick, or cozy wood, small changes can transform your home’s entrance. My personal tip? Pick one idea that excites you and have fun experimenting.
It’s your home—make the first impression count!